For this help section to work you need at least one parsed email including all the data you want parsed setup (ie. all the required rules you need) and the sample email selected in Parserr must have an attachment. If you need help, consult our “Getting Started guide” here.
1. Login to Microsoft Flow here. If you don’t have an account, you can simply sign up for a new one here. Once you have signed up you should be greeted by the home page. In the top left of the page click on “My Flows”

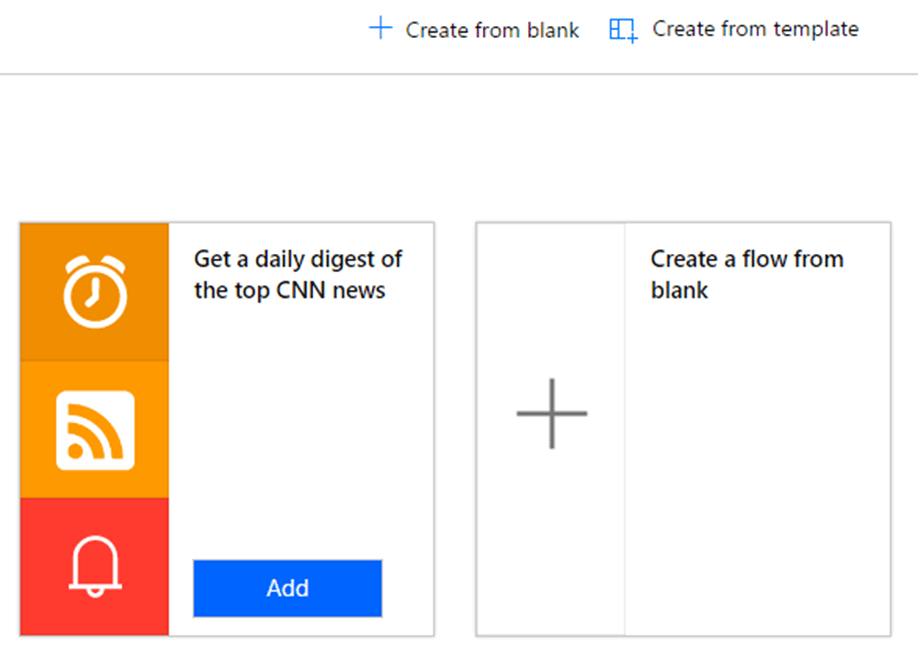
2. Click on “Create from blank” at the top of the page
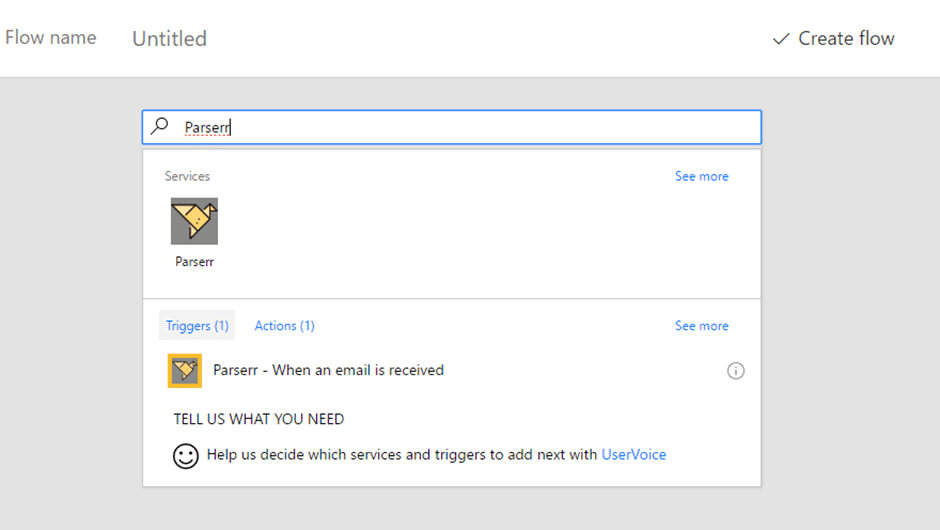
3. Search for “Parserr” in the services and triggers search box, and choose the “Trigger”, “When an email is received”
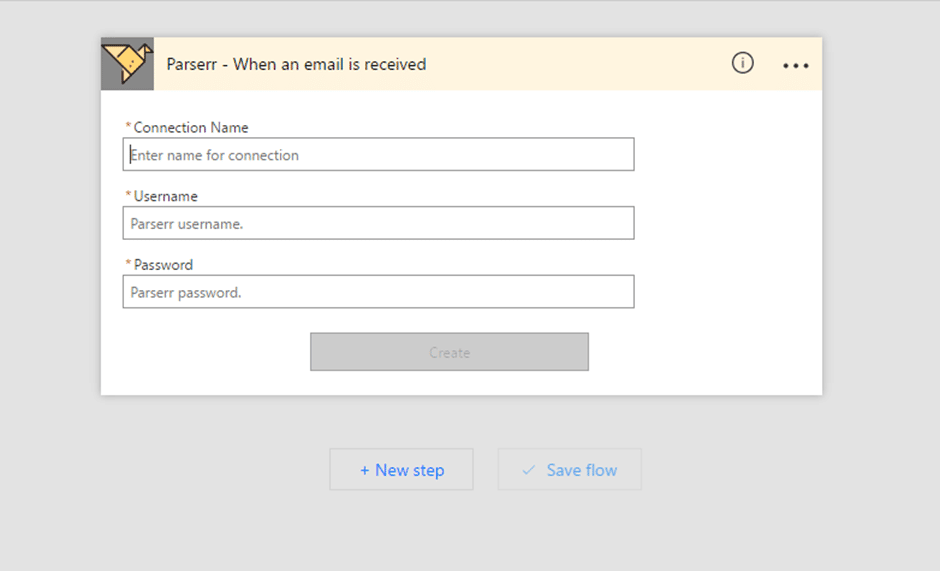
4. Type your “Connection Name”, as “Parserr” and then your username and password should be exactly the same as the ones you use with Parserr. Click the “Create” button
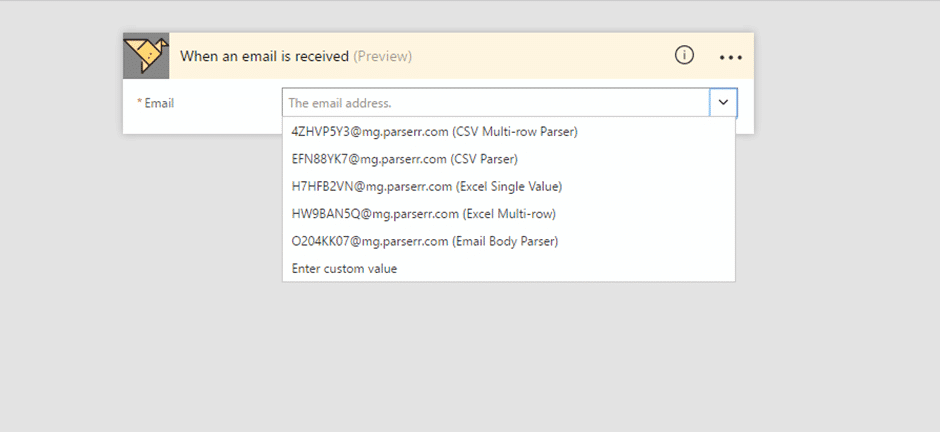
5. You should now be able to see a list of “Inboxes” from your Parserr account. If you get no values, it is most likely that your Parserr username and password were incorrectly filled out on the previous step.
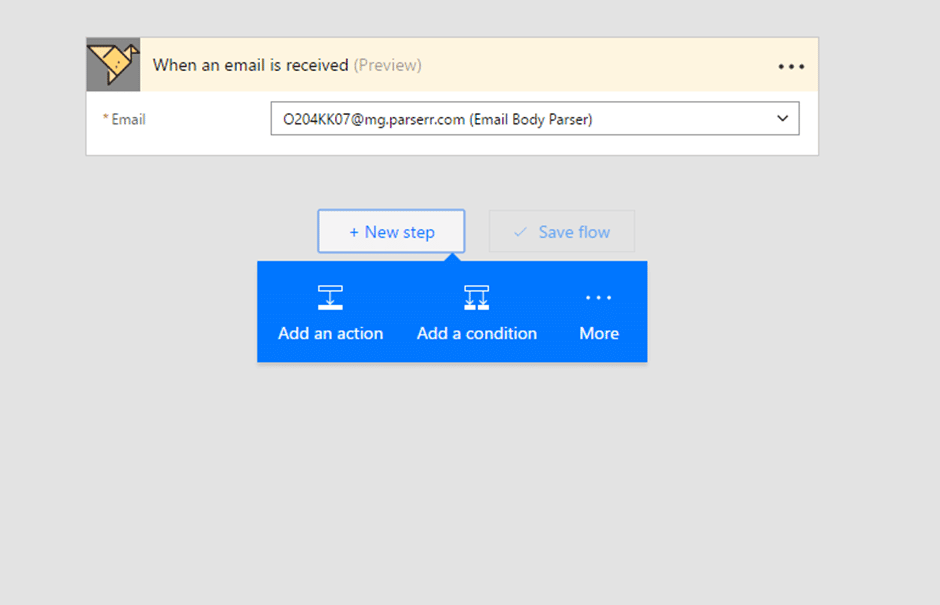
6. Once you have chosen your “Inbox”, click on “New Step” and “Add an action”. This will allow us to act on receiving an email in Parserr.
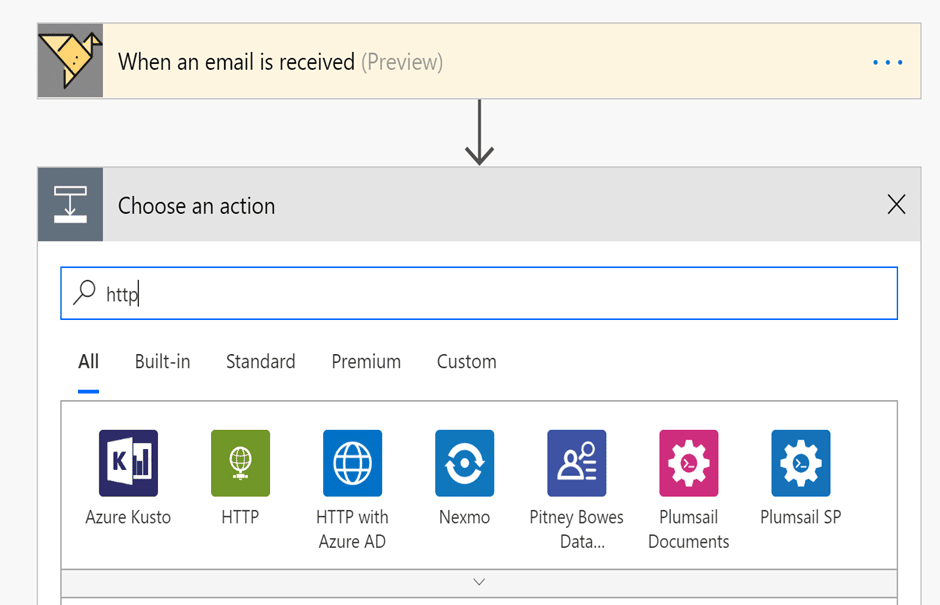
7. Search for “HTTP”
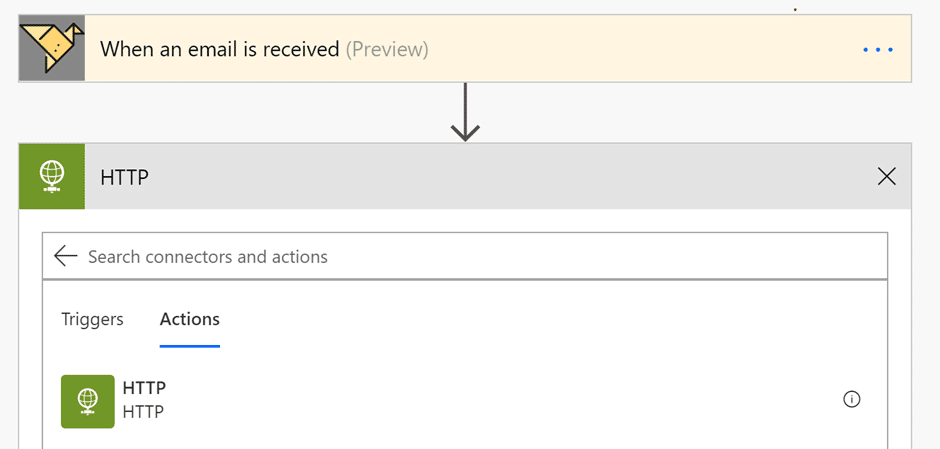
8. Choose the top “HTTP” action
9. Choose “GET” from the Method dropdown and then in the URI textbox, choose “Dynamic Content” and click the “See More” link in that box to bring up more options:
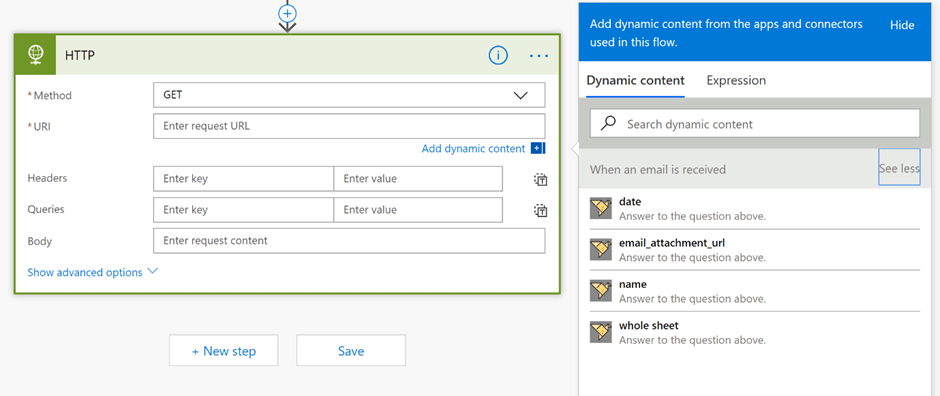
10. Add the “email_attachment_url” to the URI field and then choose to add a new step to the Flow. This is where we will add a new list item to a List with an attachment. Go ahead and search for SharePoint and choose “Create file”:
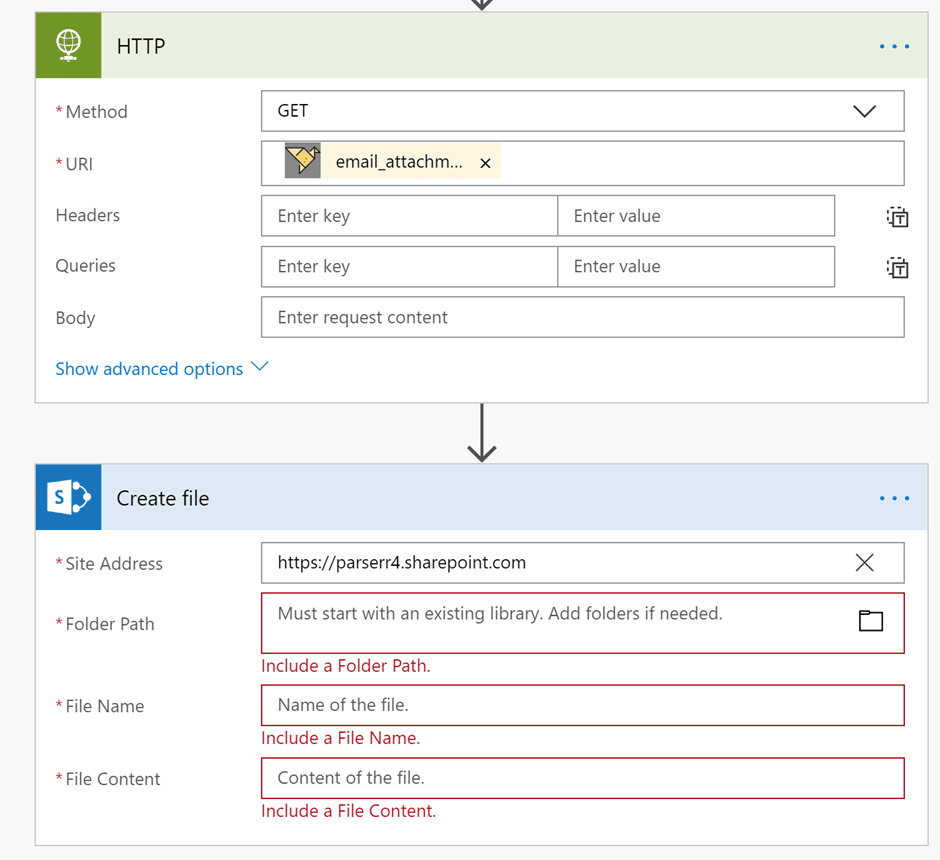
11. Choose the correct document library and then use the “email_attachment_filename” rule from Parserr to as the Filename.
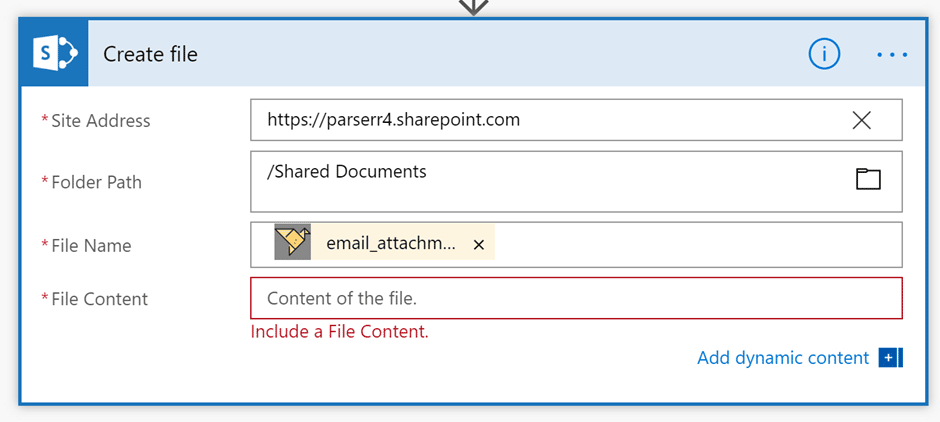
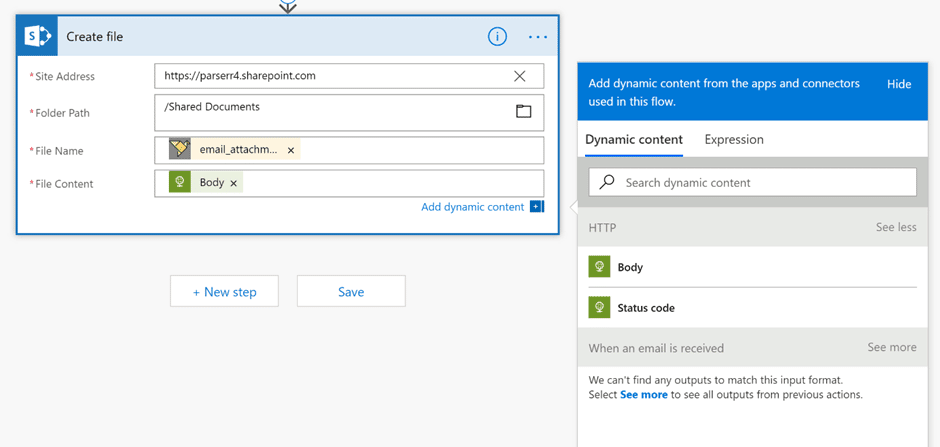
12. In the File Content column, choose to “See more” under the HTTP section in the dynamic content popup in Flow. Choose the “Body”
Once you re finished mapping your fields, simply click “Save”. Then send through a basic test email to your Parserr account. You should see your extracted data and the data sent to Microsoft Flow by expanding the email in the “Incoming Emails” section of the Parserr (click the far left arrow to expand the email to see extracted data)